Run length encoding (RLE) is a technique that isn't so widely used these days, but it's a great way to get a feel for some of the issues around using compression.
Imagine we have the following simple black and white image.
One very simple way a computer can store this image in binary is by using a format where '0' means white and '1' means black (this is a "bitmap", because we've mapped the pixels onto the values of bits).
Using this method, the above image would be represented in the following way:
There is an image format that uses the simple one-symbol-per-pixel representation we have just described.
The format is called "portable bitmap format" (PBM).
PBM files are saved with the file extension ".pbm", and contain a simple header, followed by the image data.
The data in the file can be viewed by opening it in a text editor, much like opening a .txt file,
and the image itself can be viewed by opening it in a drawing or image viewing program that supports PBM files
(the format isn't very well supported, but a number of image viewing and editing programs can display them).
A PBM file for the diamond image used earlier would be as follows:
The first two lines are the header.
The first line specifies the format of the file (P1 means that the file contains ASCII zeroes and ones).
The second line specifies the width and then the height of the image in pixels.
This allows the computer to know the size and dimensions of the image, even if the newline characters separating the rows in the file were missing.
The rest of the data is the image, just like above.
If you wanted to, you could copy and paste this representation (including the header) into a text file, and save it with the file extension .pbm.
If you have a program on your computer able to open PBM files, you could then view the image with it.
You could even write a program to output these files, and then display them as images.
Because the digits are represented using ASCII in this format, it isn't very efficient, but it is useful if you want to read what's inside the file.
There are variations of this format that pack the pixels into bits instead of characters, and variations that can be used for greyscale and colour images.
More information about this format is available on Wikipedia.
The key question in compression is whether or not we can represent the same image using fewer bits, but still be able to reconstruct the original image.
It turns out we can.
There are many ways of going about it, but in this section we are focussing on a method called run length encoding.
Imagine that you had to read the bits above out to someone who was copying them down... after a while you might say things like "five zeroes" instead of "zero zero zero zero zero".
This is the basic idea behind run length encoding (RLE), which is used to save space when storing digital images.
In run length encoding, we replace each row with numbers that say how many consecutive pixels are the same colour, always starting with the number of white pixels.
For example, the first row in the image above contains one white, two black, four white, one black, four white, two black, and one white pixel.
011000010000110
This could be represented as follows.
1, 2, 4, 1, 4, 2, 1
For the second row, because we need to say what the number of white pixels is before we say the number of black, we need to explicitly say there are zero at the start of the row.
100000111000001
0, 1, 5, 3, 5, 1
You might ask why we need to say the number of white pixels first, which in this case was zero.
The reason is that if we didn't have a clear rule about which to start with, the computer would have no way of knowing which colour was which when it displays the image represented in this form!
The third row contains five whites, five blacks, five whites.
000001111100000
This is coded as:
5, 5, 5
That means we get the following representation for the first three rows.
1, 2, 4, 1, 4, 2, 1
0, 1, 5, 3, 5, 1
5, 5, 5
You can work out what the other rows would be following this same system.
Just to ensure that we can reverse the compression process, have a go at finding the original representation (zeroes and ones) of this (compressed) image.
How much space have we saved using this alternate representation, and how can we measure it?
One simple way to consider this is to imagine you were typing these representations, so you could think of each of the original bits being stored as one character, and each of the RLE codes using a character for each digit and comma (this is a bit crude, but it's a starting point).
In the original representation, 225 digits (ones and zeroes) were required to represent the image.
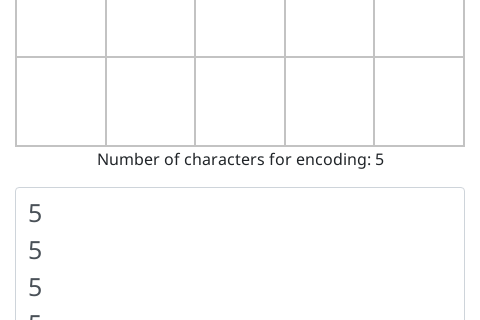
Count up the number of commas and digits (but not spaces or newlines, ignore those) in the new representation.
This is the number of characters required to represent the image with the new representation (to ensure you are on the right track, the first 3 rows that were given to you contain 29 characters).
Assuming you got the new image representation correct, and counted correctly, you should have found there are 121 characters in the new image (double check if your number differs).
This means that the new representation only requires around 54% as many characters to represent (calculated using 121/225).
This is a significant reduction in the amount of space required to store the image – it's about half the size.
The new representation is a compressed form of the old one.
Run length encoding representation in practice
Curiosity
In practice this method (with some extra tricks) can be used to compress images to about 15% of their original size.
In real systems, the original image only uses one bit for every pixel to store the black and white values (not one character, which we used for our calculations).
However, the run length numbers are also stored much more efficiently, again using bit patterns that take very little space to represent the numbers.
The bit patterns used are usually based on a technique called Huffman coding, but we will get to that later.
The main place that black and white scanned images are used now is on fax machines, which use this approach to compression.
One reason that it works so well with scanned pages is that the number of consecutive white pixels is huge.
In fact, there will be entire scanned lines that are nothing but white pixels.
A typical fax page is 200 pixels across or more, so replacing 200 bits with one number is a big saving.
The number itself can take a few bits to represent, and in some places on the scanned page only a few consecutive pixels are replaced with a number, but overall the saving is significant.
In fact, fax machines would take 7 times longer to send pages if they didn't use compression.
Using run length encoding for yourself
Project
Now that you know how run length encoding works, you can come up with and compress your own black and white image, as well as decompress an image that somebody else has given you.
Start by making your own picture with ones and zeroes (make sure it is rectangular – all the rows should have the same length).
You can either draw this on paper or prepare it on a computer (using a fixed width font, otherwise it can become really frustrating and confusing!).
In order to make it easier, you could start by working out what you want your image to be on grid paper (such as that from a math exercise book) by shading in squares to represent the black ones, and leaving them blank to represent the white ones.
Once you have done that, you could then write out the zeroes and ones for the image.
Work out the compressed representation of your image using run length encoding, i.e. the run lengths separated by commas form that was explained above.
Now give a copy of the compressed representation (the run length codes, not the original uncompressed representation) to a friend or classmate, along with an explanation of how it is compressed.
Ask them to try and draw the image on some grid paper.
Once they are done, check their conversion against your original.
Imagine that you and your friend are both computers; by doing this you have shown that images using these systems of representations can be compressed on one computer, and decompressed on another, as long as you have standards that you've agreed on (e.g. that every line begins with a white pixel).
It is very important for compression algorithms to follow standards so that a file compressed on one computer can be decompressed on another.
For example, songs often follow the "mp3" standard so that when they are downloaded they can be played on a variety of devices.