Computer Vision
14.3. Noise
One challenge when using digital cameras is something called noise. That’s when individual pixels in the image appear brighter or darker than they should be, due to interference in the electronic circuits inside the camera. It’s more of a problem when light levels are dark, and the camera tries to boost the exposure of the image so that you can see more. You can see this if you take a digital photo in low light, and the camera uses a high ASA/ISO setting to capture as much light as possible. Because the sensor has been made very sensitive to light, it is also more sensitive to random interference, and gives photos a "grainy" effect.
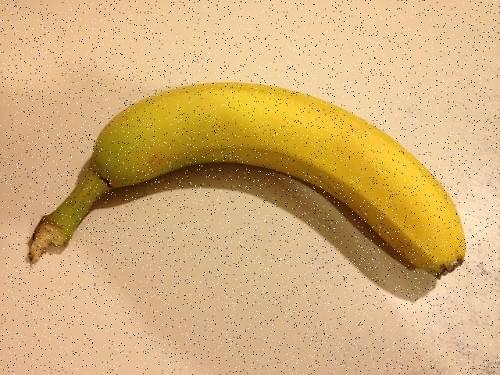
Noise mainly appears as random changes to pixels. For example, the following image has "salt and pepper" noise.

Having noise in an image can make it harder to recognise what's in the image, so an important step in computer vision is reducing the effect of noise on an image. There are well-understood techniques for this, but they have to be careful that they don’t discard useful information in the process. In each case, the technique has to make an educated guess about the image to predict which of the pixels that it sees are supposed to be there, and which aren’t.
Since a camera image captures the levels of red, green and blue light separately for each pixel, a computer vision system can save a lot of processing time in some operations by combining all three channels into a single "grayscale" image, which just represents light intensities for each pixel.
This helps to reduce the level of noise in the image. Can you tell why, and about how much less noise there might be? (As an experiment, you could take a photo in low light – can you see small patches on it caused by noise? Now use photo editing software to change it to black and white – does that reduce the effect of the noise?)
Rather than just considering the red, green and blue values of each pixel individually, most noise-reduction techniques look at other pixels in a region, to predict what the value in the middle of that neighbourhood ought to be.
A mean filter assumes that pixels nearby will be similar to each other, and takes the average (i.e. the mean) of all pixels within a square around the centre pixel. The wider the square, the more pixels there are to choose from, so a very wide mean filter tends to cause a lot of blurring, especially around areas of fine detail and edges where bright and dark pixels are next to each other.
A median filter takes a different approach. It collects all the same values that the mean filter does, but then sorts them and takes the middle (i.e. the median) value. This helps with the edges that the mean filter had problems with, as it will choose either a bright or a dark value (whichever is most common), but won’t give you a value between the two. In a region where pixels are mostly the same value, a single bright or dark pixel will be ignored. However, numerically sorting all of the neighbouring pixels can be quite time-consuming!
A Gaussian blur is another common technique, which assumes that the closest pixels are going to be the most similar, and pixels that are farther away will be less similar. It works a lot like the mean filter above, but is statistically weighted according to a normal distribution.
Open the noise reduction filtering interactive below and experiment with the settings.
Mathematically, this process is applying a special kind of matrix called a convolution kernel to the value of each pixel in the source image, averaging it with the values of other pixels nearby and copying that average to each pixel in the new image. In the case of the Gaussian blur, the average is weighted, so that the values of nearby pixels are given more importance than ones that are far away. The stronger the blur, the wider the convolution kernel has to be and the more calculations take place.
For this activity, investigate the different kinds of noise reduction filter and their settings (grid size, type of blur) and determine:
- How well they cope with different levels of noise (you can set this in the interactive or upload your own noisy photos).
- How much time it takes to do the necessary processing.
- How they affect the quality of the underlying image (a variety of images + camera).
You can take screenshots of the image to show the effects in your writeup. You can discuss the tradeoffs that need to be made to reduce noise.


